Duda Tip: Showing Page Scroll Progress
If you have a website page that’s on the longer side, it can be helpful to show viewers where they are in their scroll! The simplest way to do this: display a progress bar. It adds visual interest to your site, and it gives readers an important reference point as they move below the fold. With Duda, this is an easy addition — the
Dear America Foundation created one that highlights their brand colors. Today, we’re here to show you how to show page scroll progress on your site. Follow the instructions below to implement this Duda tip on your site, or check out this video to watch each step in real time!

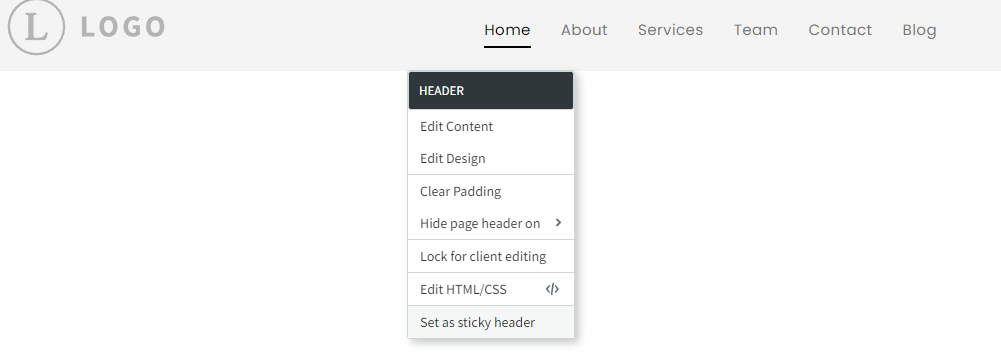
Step 1: Create a sticky header.
On your Duda website, select your header and click “Set as sticky header.” This setting must be turned on for your progress bar to show up!
Step 2: Select your header and edit the design.
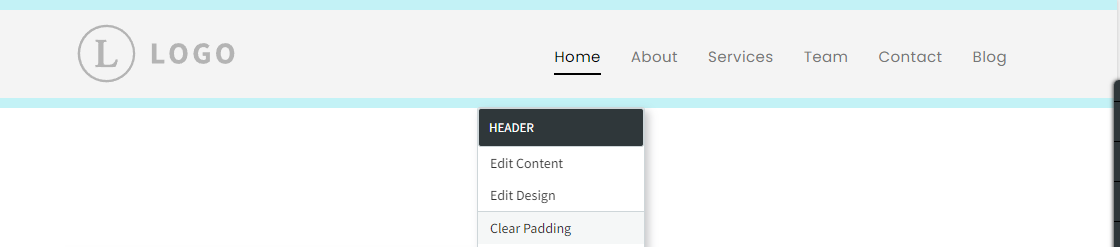
After you’ve created a sticky header, select "Edit Design.” This will open a menu box.
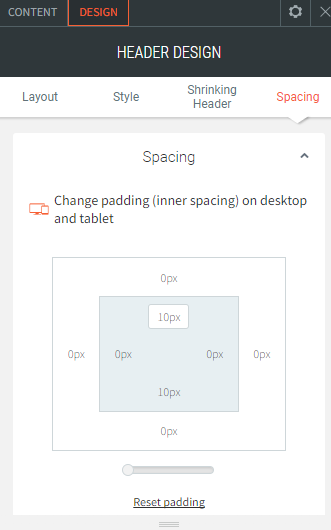
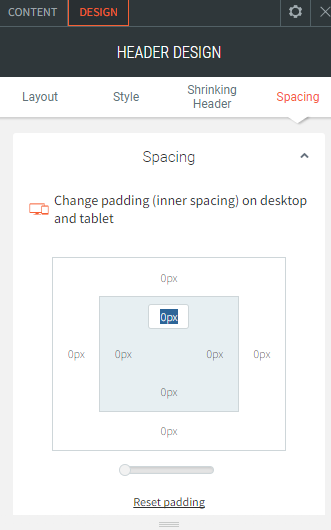
Step 3: Change your default padding.
In the design menu, navigate to “Spacing” on the far right. From here, change your default padding to zero for both top and bottom.
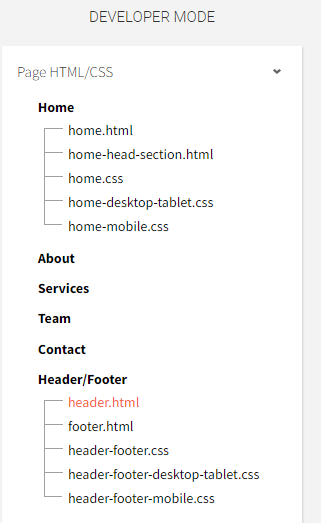
Step 4: Head to Developer Mode.
After your padding settings have been saved, open Developer Mode and find the section labeled “Header/Footer.” In that menu select header.html.
Step 5: Paste the first part of the progress bar code.
In the header.html menu, paste the custom code below right after the first line of code:
<div class="progress-container">
<div class="progress-bar" id="myBar">
</div>
</div>
It should look like this:

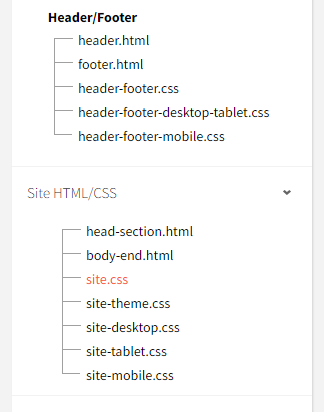
Step 6: Go to the Site HTML/CSS menu.
While still in Developer Mode, revisit the main menu and find Site HTML/CSS. It’s just below the Header/Footer options. From there, select site.css.
Step 7: Paste the second part of the progress bar code.
It’s time to add the second part of the progress bar code to the bottom of your editor. Paste the following custom code into your site:
.progress-container {
width: 100%;
height: 8px;
background: #bf0b30; /* color of the container - #bf0b30 is red */
}
.progress-bar {
height: 8px;
background: #002768; /* color of the progress bar - #002768 is blue */
width: 0%; /* width is set to zero as the initial state and will be overridden by javascript */
}
.prog{
left:0 !important;
top:0 !important ;
transition: all ease 0.3s;
}
It should look like this:

Step 8: Choose your colors.
To change the color of your progress bar, you'll need to edit the hex color code under the background property above for both the progress container and the progress bar itself. You can use an external tool, like HTML Color Codes, to pick a color you like if you don't already have branded hex color codes in mind. Once your colors are selected, save the code and go back to the HTML/CSS menu.
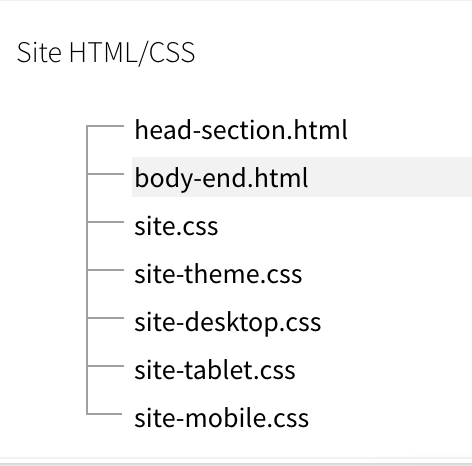
Step 9: Go back to the Site HTML/CSS menu.
In the HTML/CSS menu, select body-end.html – it’s located right above site.css.
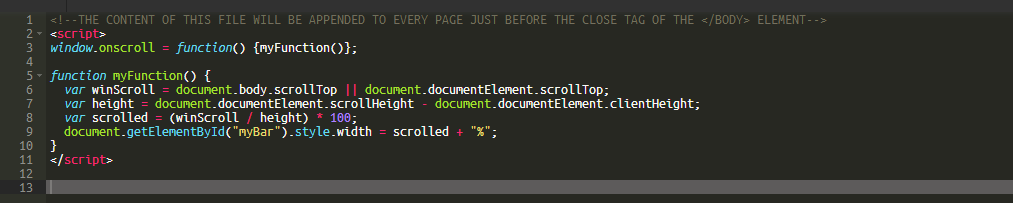
Step 10: Paste the third part of the progress bar code.
It’s the final coding step! Paste the following custom code into your site:
<script>
window.onscroll = function() {myFunction()};
function myFunction() {
var winScroll = document.body.scrollTop || document.documentElement.scrollTop;
var height = document.documentElement.scrollHeight - document.documentElement.clientHeight;
var scrolled = (winScroll / height) * 100;
document.getElementById("myBar").style.width = scrolled + "%";
}
</script>
It should look like this:
Step 11: Save and enjoy.
There you have it! A progress bar with custom colors, there to show visitors how far along they are on your page. Here’s the final result from our Dear America Foundation project: