Duda Tip: Creating a Custom Shape Hero
Designing a well-structured and visually appealing hero is key to welcoming your website visitors. Located at the top of the visual hierarchy, the hero section of your website is the first visual element your visitors see, which is why we should make it as visually appealing as possible, and that is where this Duda tip comes in. We will walk you through a few simple steps to create a custom hero shape to visually enhances your hero section and perfectly complement your Duda site, just as we did for our client
Assurecare Advisors. Their final result looked like this:

Want to do the same on your site? Let’s get started! You can follow the instructions below to implement this Duda tip on your site or check out this video to watch each step in real time.
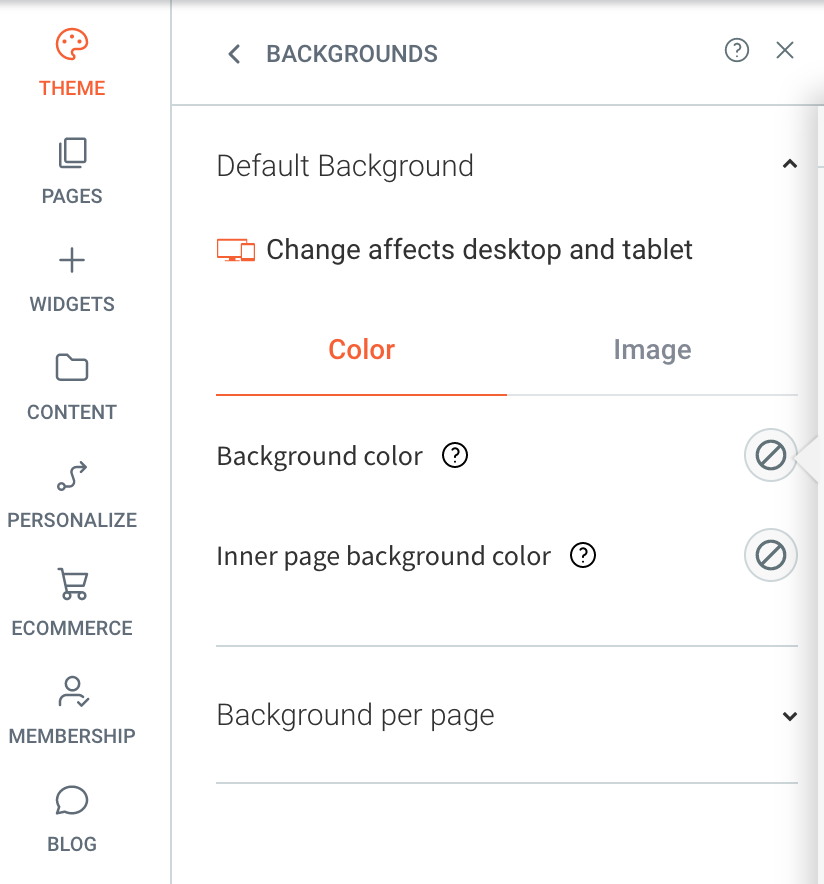
Step 1: Ensure the default background color is set to none.
On your left side menu, navigate to Theme > Backgrounds > Default Background and set the Background color to none.
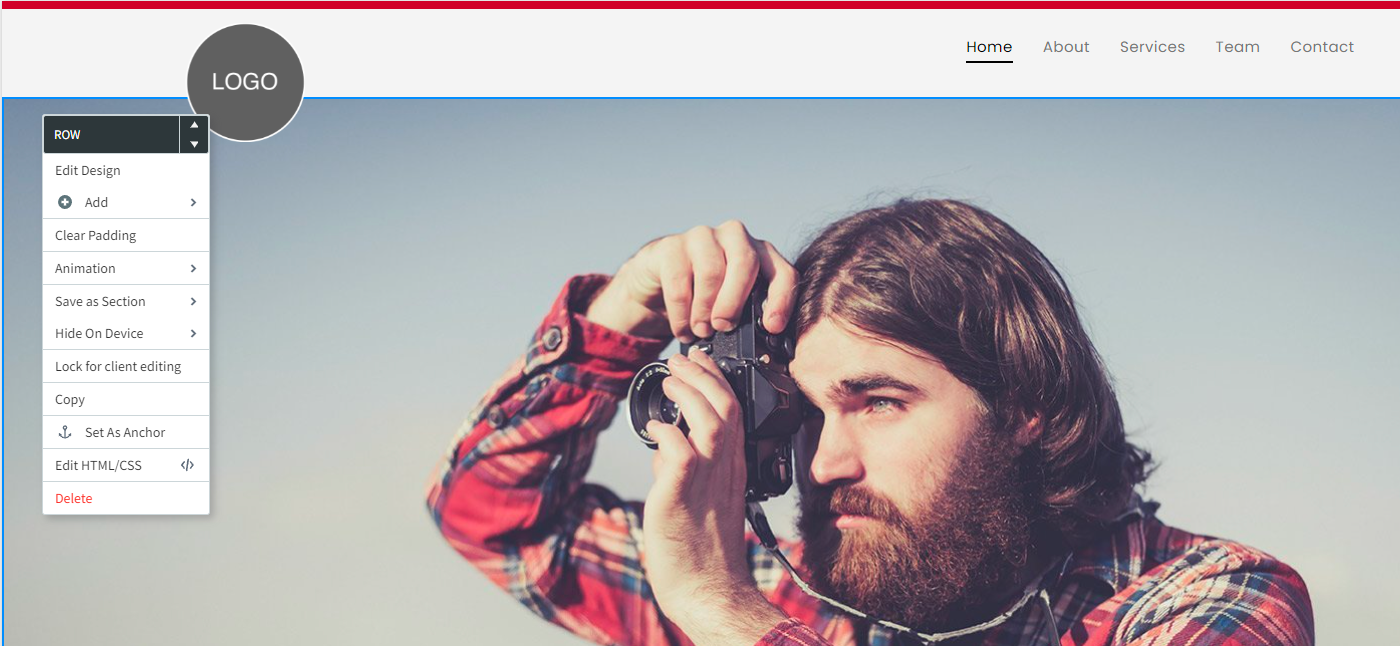
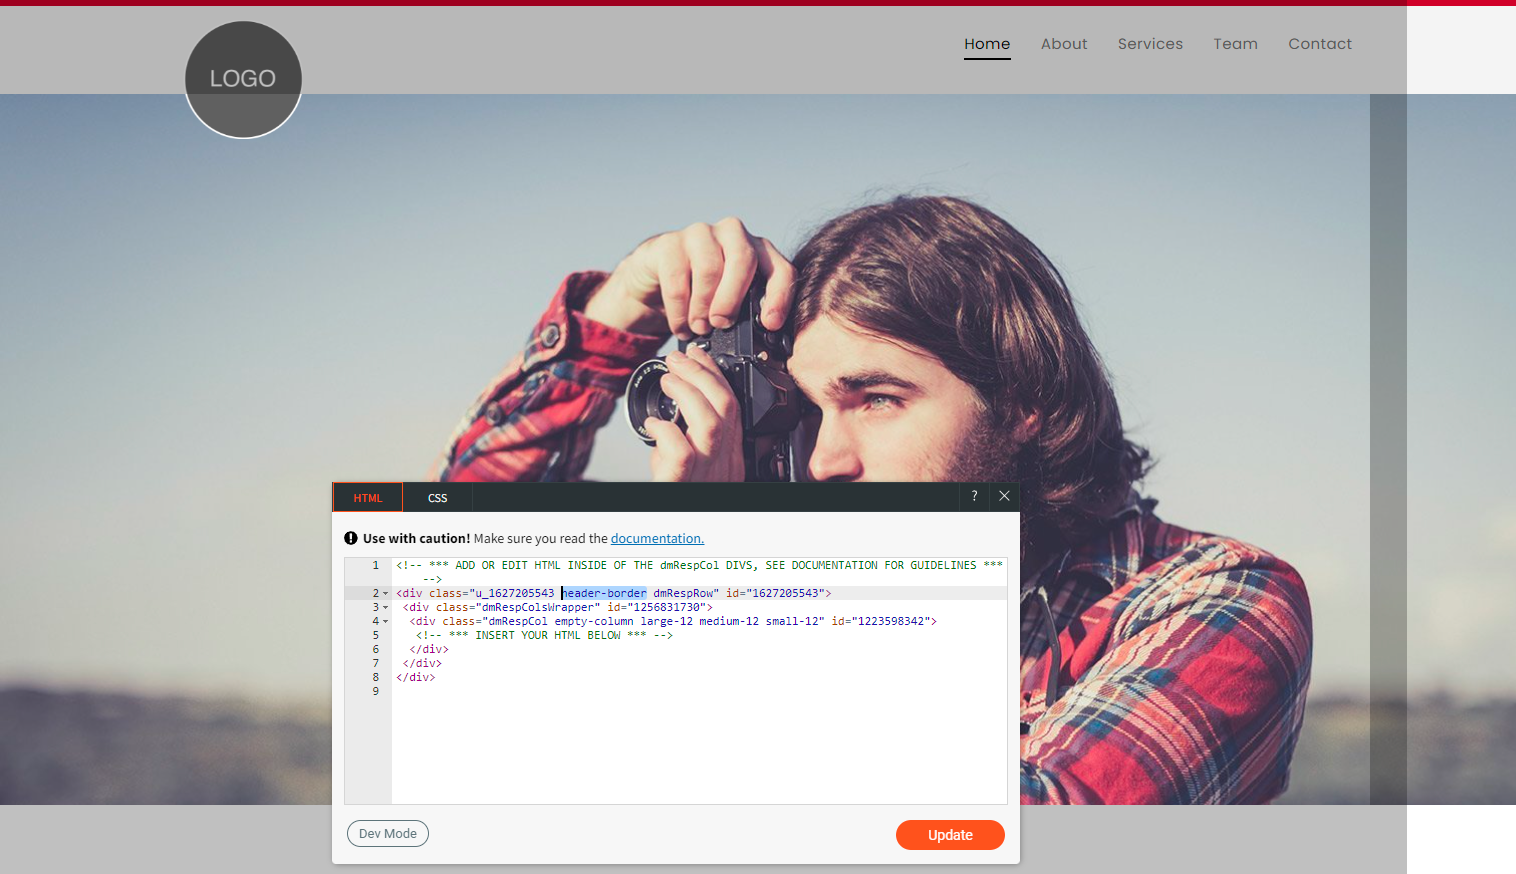
Step 2: Add a custom class to the HTML of the editor.
Right-click your hero row and “Edit HTML/CSS.” Add the following class to the second line of code under HTML.
header-border
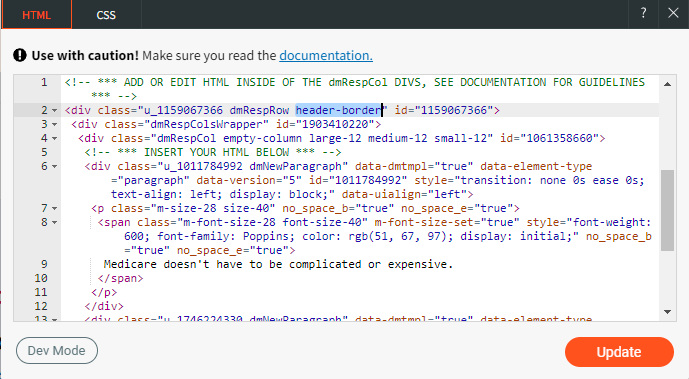
Step 3: Add the class to CSS
Now go to the CSS tab > Device Specific CSS. There, paste the following code and update.
border-radius:0 0 50vh !important; /* radius of the container denotes 0 top left - 0 top right & bottom left - 50vh bottom right */
It should look like this:

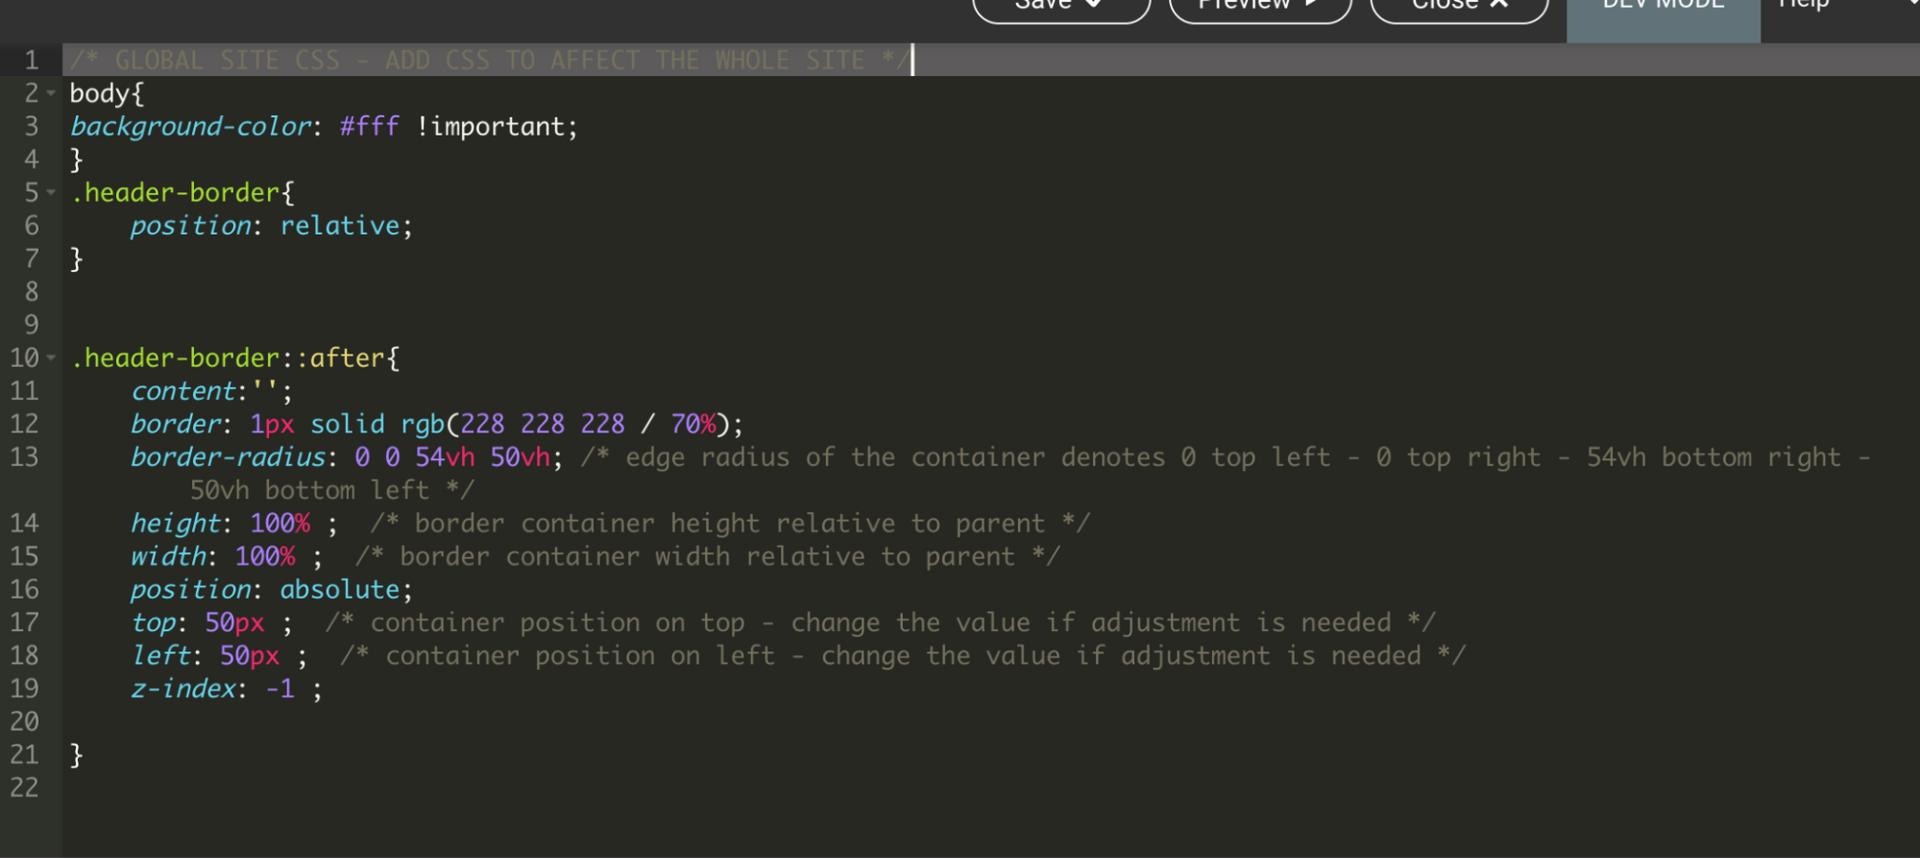
Step 4: Head to Developer Mode
Now, open Developer Mode and find the section labeled “Site HTML/CSS.” In that menu select site.css.
Step 5: Add your custom border-radius
Under site.css, add the following code snippet. Feel free to check
CSS border-radius property (w3schools.com) for additional information on border-radius.
body{
background-color: #fff !important;
}
.header-border{
position: relative;
}
.header-border::after{
border: 1px solid rgb(228 228 228 / 70%);
border-radius: 0 0 54vh 50vh; /* edge radius of the container denotes 0 top left - 0 top right - 54vh bottom right - 50vh bottom left */
height: 100%; /* border container height relative to parent */
width: 100%; /* border container width relative to parent */
position: absolute;
top: 50px; /* container position on top - change the value if adjustment is needed */
left: 50px; /* container position on left - change the value if adjustment is needed */
z-index: -1;
}
It should look like this:
Step 6: Save and enjoy
Click “Save” and you’re finished! A Custom Shape Hero, welcoming your website visitors with an enhanced experience on your site right from the start. Your finished product should look something like this: