Duda Tip: Element Overlap
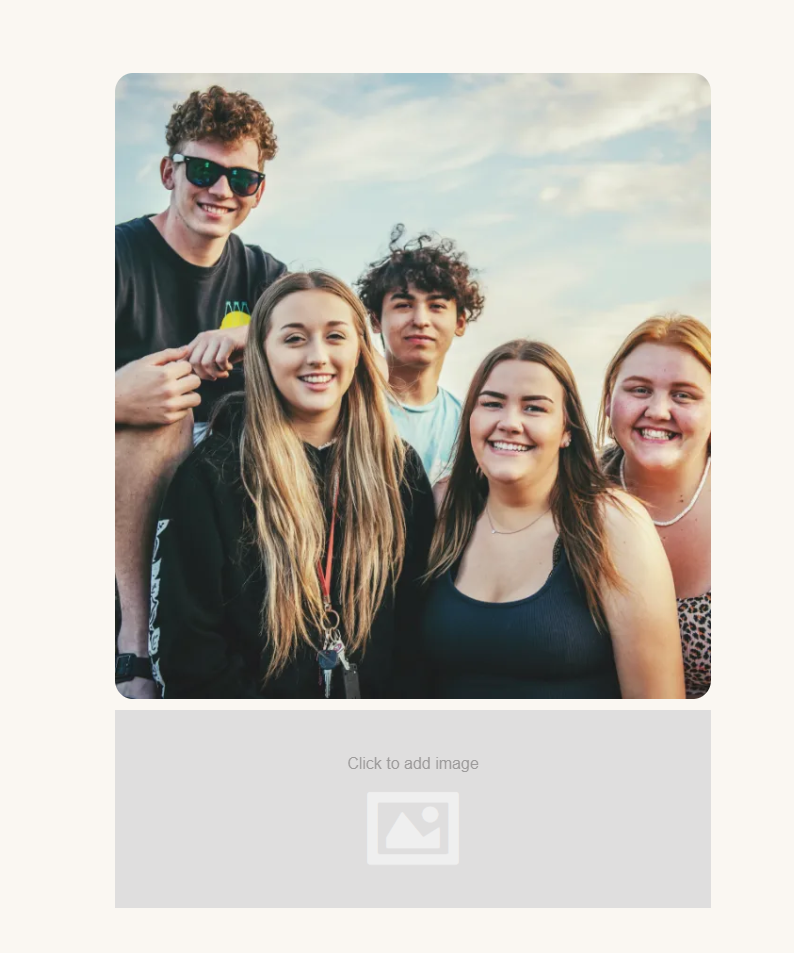
Want to enhance the functionality and design of your website without complicated coding? With Duda, you can. Today, we’re showing you how to upgrade images by layering design elements, adding visual interest to any page. Here’s the finished product in our example image:

City skyline
By overlapping this abstract element behind the image itself, we can create a layered look that matches brand colors and keeps a site from looking bland or boring. Want to try this on your site? Here’s how to put this Duda Tip to work.
Step 1: Add the widget.
Head to the image you’d like to overlap. Add the image widget below it.
City skyline
Step 2: Choose your design element.
Choose a design for your overlapping element. You can download this exact shape
right here, or search for one that fits your design aesthetic. We like to source elements
here and
here, but you can use any element with a transparent background!

City skyline
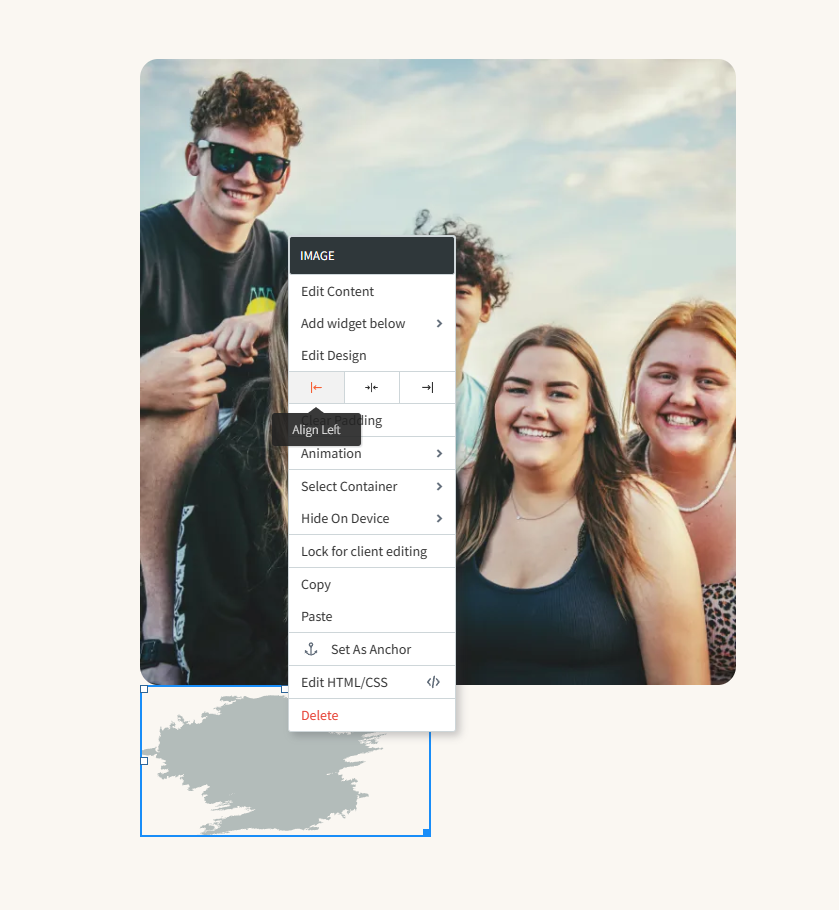
Step 3: Position your design element.
Align your design with the left or right side of the image. This step must be completed in order for the following steps to work!
City skyline
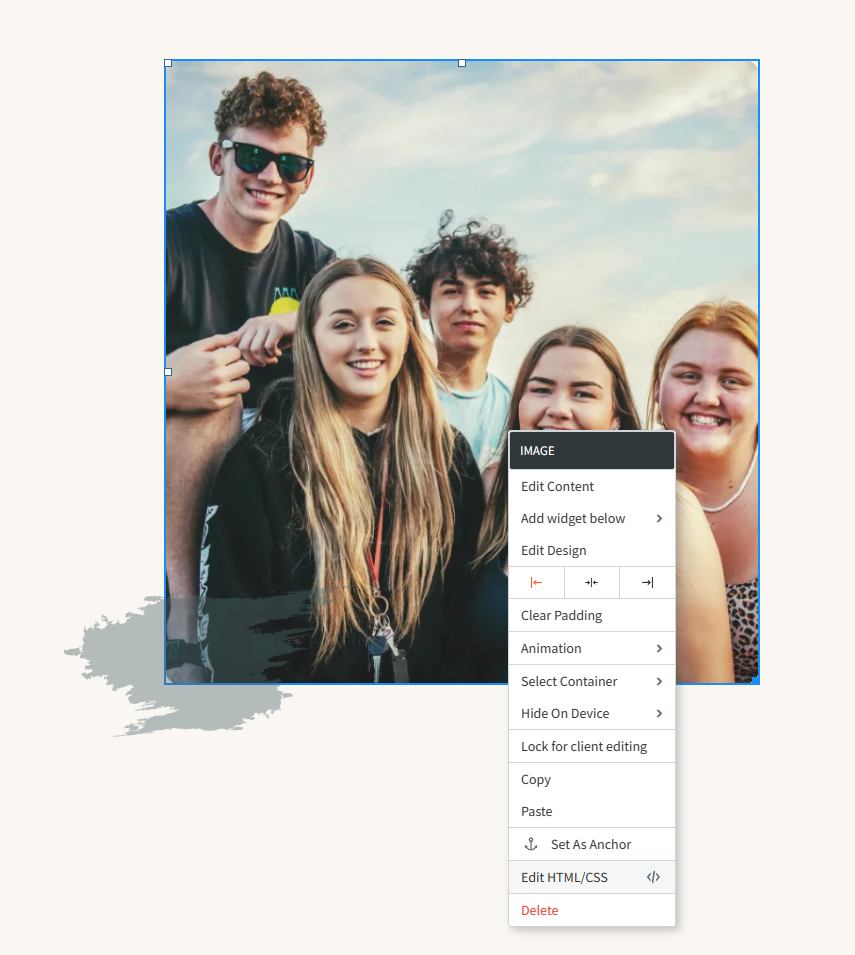
Step 4: Set the overlap.
Under image design in your editor, click on spacing and set a negative value that aligns the design element over the image. Margin moves the content away from its original position, so you can customize the location of your overlap as needed. In this example, we added negative value on the top and left to place this design over the bottom left corner of our image.
Learn more about margin values here.

City skyline
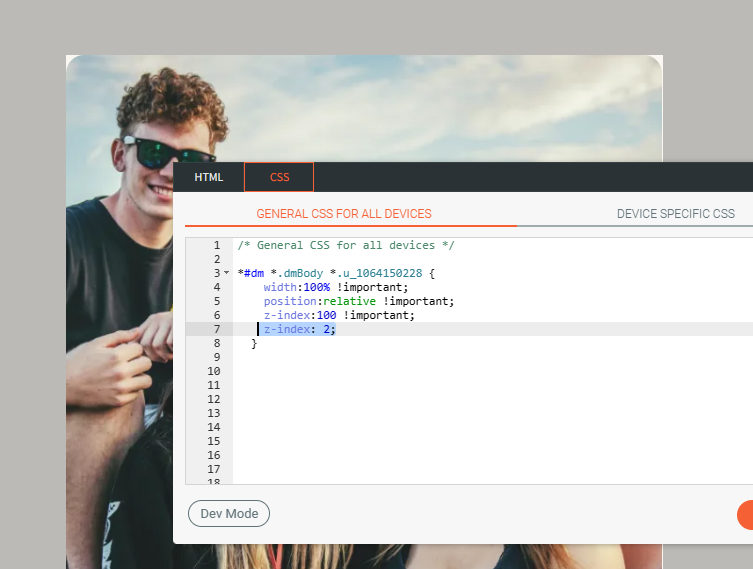
Step 5: Open the code editor.
By default, the overlapped design is on the top of the image – but we can use Z-index code to layer them correctly. Select Edit HTML/CSS on the image to do this.
City skyline
Step 6: Move the image in front of the element.
To move the image to the right spot, we’ll use the
z-index property, which specifies the stack order of design elements. We want to stack the image on top of the design in this case! An element with greater stack order is always in front of an element with a lower stack order — which means the element with the higher number of z-index will be on the front. Once you’re in the CSS tab, add “z-index: 2” just below all the code inside, to move the image in front of the design. We added "z-index: 2" to the image so it will bring the image in front of the shape. We
didn't add z-index to the shape element because by default all elements are positioned to z-index: 0. Once you’ve finished, click update.
City skyline
There you have it: the finished product! Your new and improved photo design is live on your website. And yes, it works with mobile functionality too – no additional code needed!
City skyline